Small Kitchen Remodel Before and After


I can’t even tell you how excited we are about our kitchen renovation reveal and how well it turned out! And I’m even more excited to share our process and how we got here. Because it definitely didn’t always look this pretty. Our kitchen renovation was a long time in the making. To say we finally have a fully functioning, updated, BEAUTIFUL kitchen is such a dream. I think the engineered wood floors we chose are my favorite part!
A small kitchen doesn’t have to mean you sacrifice style or function. If you are strategic with your decisions, you can make great use of the space that works for your family.
Without further adieu, let’s dive right in to our small kitchen remodel before and after and how we got here.
This post contains affiliate links for your convenience. Click here for full disclaimer.
As a brief recap if you are new around here, we bought this home 4 years ago in Iowa. It is an older home that hadn’t been updated since the 70s we guess. Everything about the kitchen was out-dated. But the home had potential and it was a great price, so it made a good starter home.
Small Kitchen Remodel Before and After
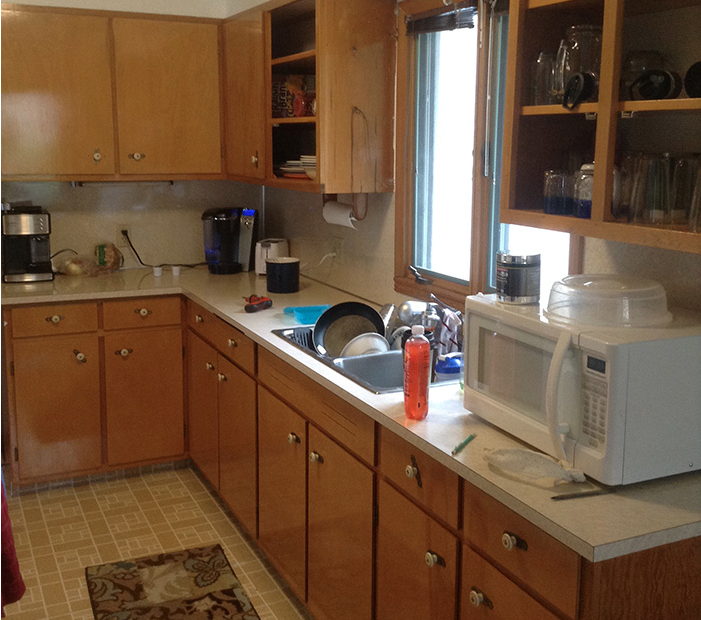
Here’s what the kitchen looked like when we bought it. This was taken during the process of painting our cabinets, hence a few of the cabinet doors removed, which we did a few months after moving in. One great bonus is this kitchen actually has quite a bit of cabinets, which is not always the case with small kitchens.
Before

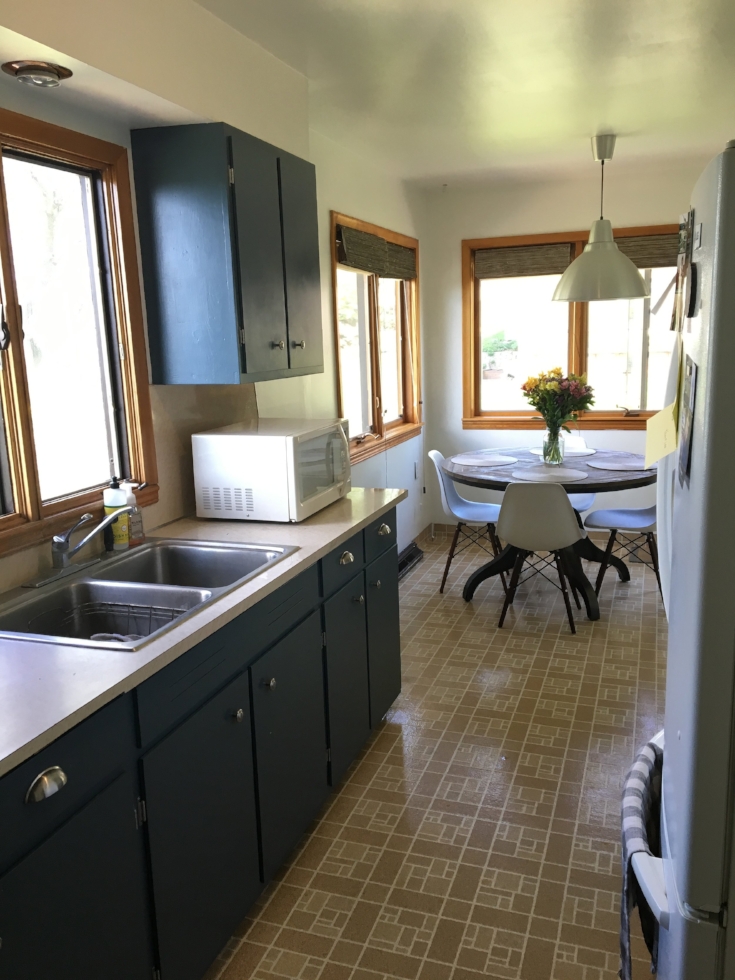
After we painted and turned them into pretty blue kitchen cabinets using the color Northern Star by Pratt & Lambert, it looked like this. We painted to get rid of the terrible orangey cabinets and it looked better. But at this point we still had linoleum floors and counters and the old, original appliances.
While we knew we wanted to renovate the kitchen eventually, it wasn’t in the budget to do it right away. We lived with the painted cabinets and out-dated appliances and floors for a few years.
In the meantime, we talked about our plans and what we wanted to do with our kitchen eventually. Being a galley kitchen, we didn’t have the option to add an island so the floor plan would remain the same. Since we were doing the remodel ourselves and we don’t take on debt for projects, we waited until we had money saved up and we were comfortable enough taking on the work.

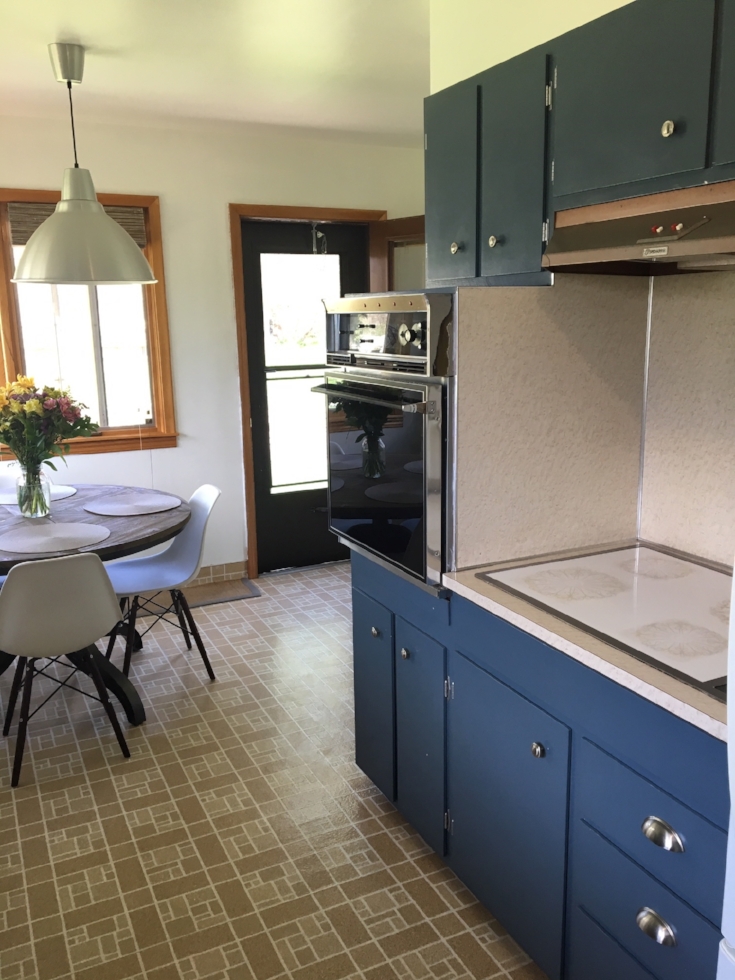

The biggest issue with our kitchen is it just wasn’t an inspiring place to hang out. We cook a lot and hardly ever eat out, so we’re always in the kitchen. The oven was so small with only one rack, and the stove top was old and the knobs were wearing off so you couldn’t see the burner temperatures. It wasn’t that functional and certainly didn’t feel like “us.”
After 3 (!!!!) years of living in our home with an out-dated kitchen, we finally tackled the kitchen renovation the summer of 2018. It was kind of a last minute decision to do it, actually. We had talked about starting within the year, but to make it even more stressful, we decided to start the reno just a a couple months before our wedding! Because why not ha. Nothing like a hard deadline to get everything finished in time! Excited doesn’t even BEGIN to express how happy I was to rip out the out-dated kitchen.
But first, let’s talk design plans.
The Design Plan
As the type A planner that I am, I had our design plan figured out well before we actually started demo. We weren’t adding on or changing the footprint of our kitchen, but we were updating counters, floors, hardware, lighting, backsplash, appliances, window treatment and cabinets.
The overall vibe I wanted for the kitchen is the same as the rest of our house: light, airy, cozy with a mix of rustic + modern elements.
To figure out what we wanted for cabinets and counters and all the other details, I did some research, of course spent time on Pinterest pinning ideas, and then created a mood board so I had a visual of what all the elements looked like together, creating my design plan.
If you want a more in-depth look at how I research and create a room design plan, read this.
Flooring
When we put in our wood floors in the living room over a year ago, we purchased enough for the kitchen, knowing we were updating those floors at some point too, so we had the flooring already figured out. Installing matching flooring that flows from room to room goes a long way in making the spaces feel cohesive and it makes rooms feel bigger and less choppy.
It looks like the exact flooring we used is discontinued, but this flooring is by the same brand and looks very similar in finish. We LOVE our engineered wood floors and they had no scratches after a year with a dog which is pretty impressive. Not all flooring is created equal, and I think the brand is high quality and has a hard finish that resists scratches.
Related Post: How to Choose Wood Flooring: Laminate vs. Hardwood
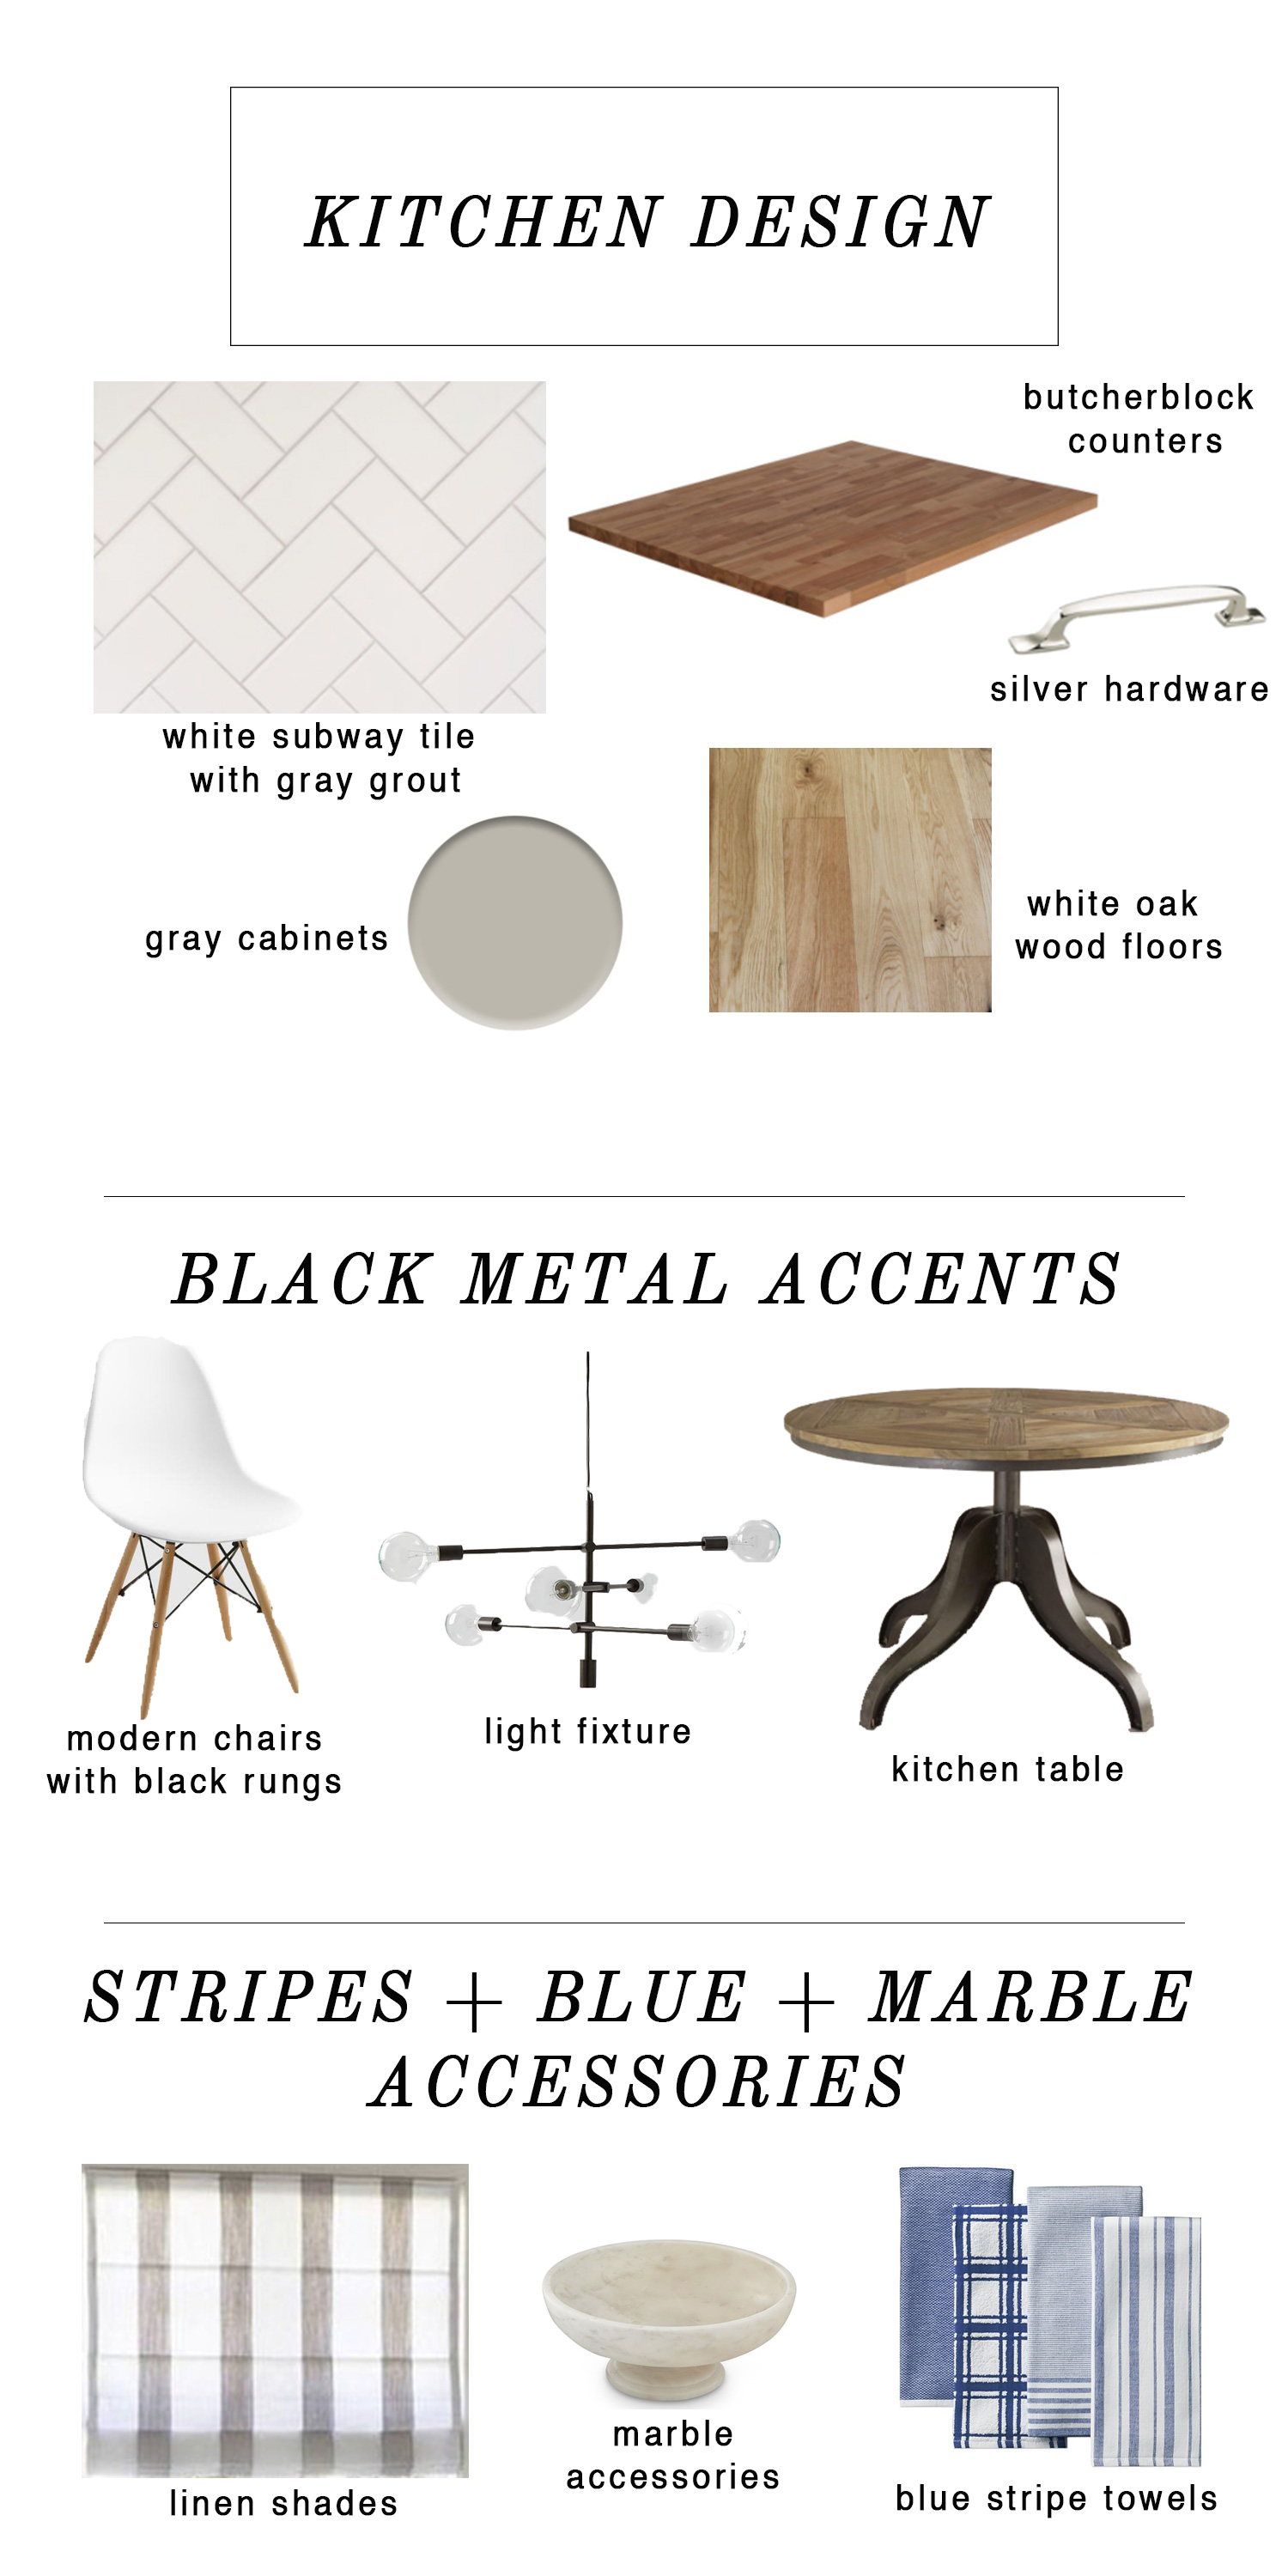

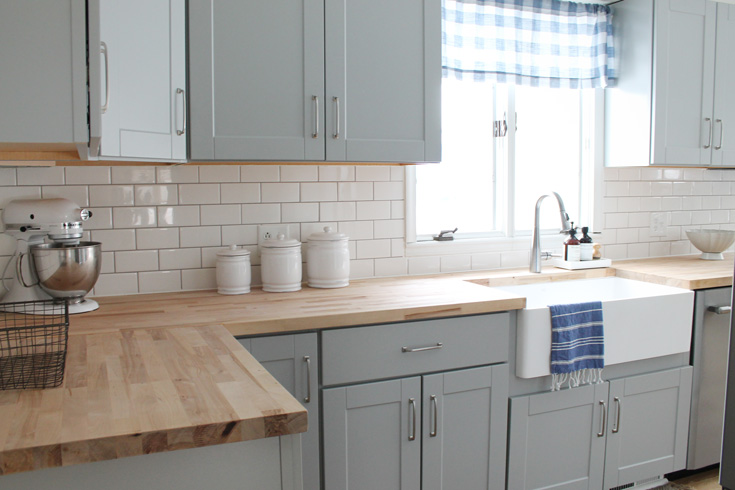
Backsplash + Countertops
We did white subway tile in our bathroom, so I wanted white subway tile backsplash in our kitchen to repeat the look and create cohesiveness. I’m a big fan of classic backsplash that you won’t tire of after a few years. Subway tile is always a practical yet beautiful option that’s pretty affordable.
For countertops, it was between white quartz or butcher block. Quartz counters were over double the cost of butcher block, so that’s ultimately why we chose wood counters. While I do love the look of butcher block, this isn’t our forever home so we didn’t want to spend more than what we’d actually get back when we decide to sell, so butcher block made sense. They do require a little more maintenance, so that’s something to keep in mind. I researched how to care for butcher block a ton and found that with a little extra care and some mineral oil, they will hold up for years.
Appliances
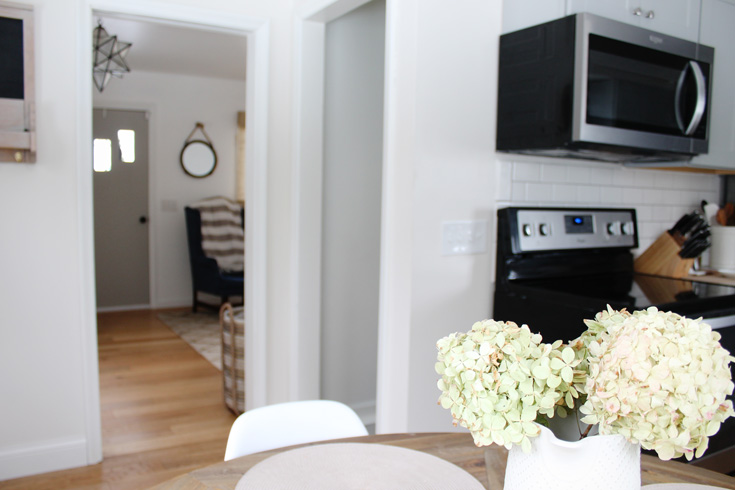
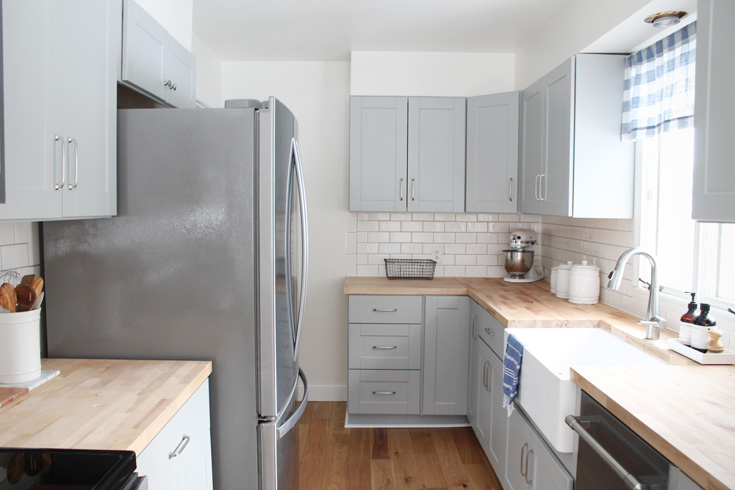
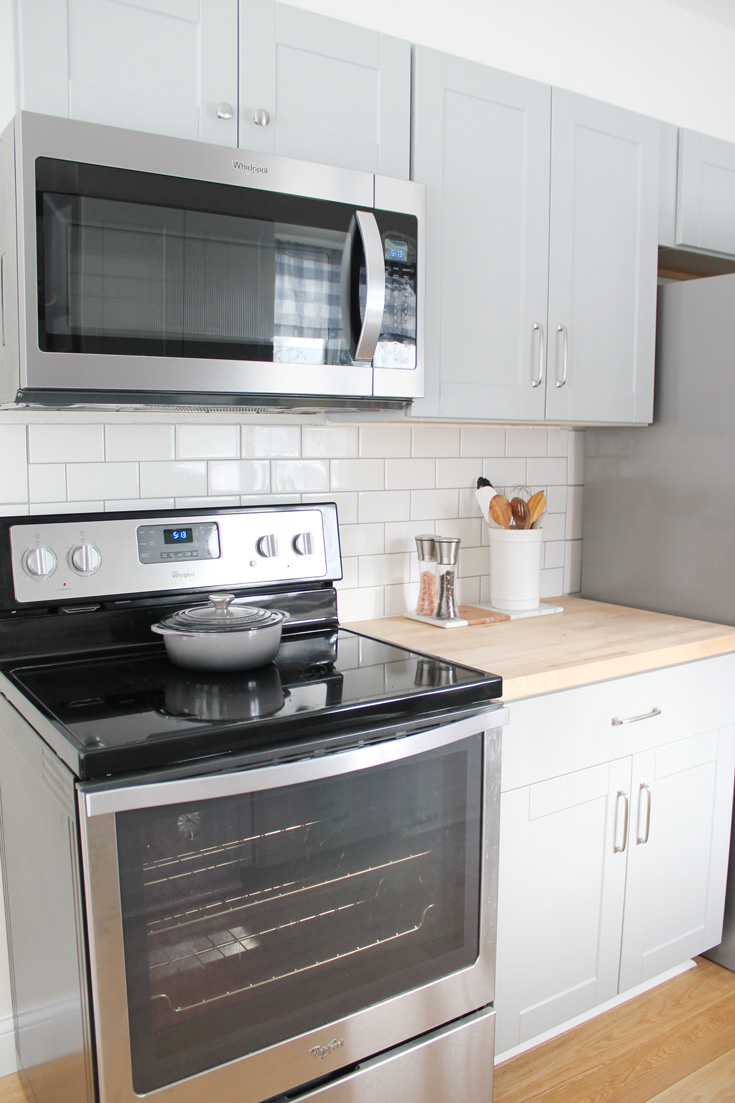
Taking out the old stove top and built-in wall oven meant we had to rework the location of the new appliances a bit. It’s actually more cost effective to have a combined range and oven, so we shifted it over slightly to add some extra counter space. We also were installing a dishwasher (finally!!), getting a new microwave that mounted above the range to allow for more counter space, and a new fridge. The dishwasher was the most exciting part of the new kitchen, I think. Washing dishes is my LEAST favorite chore. I like the look of stainless steel so that’s what we went with. for our appliances. Usually you can get a discount if you buy appliances in a bundle package which is what we did at Nebraska Furniture Mart.
On to kitchen cabinets…our biggest dilemma.
While I love the blue kitchen cabinets we had, I wanted our new cabinets to be more neutral. We went back and forth on whether we’d keep the current cabinets and just paint them, or if we’d install all new cabinets.
Ideally, I wanted new cabinets. We’d have to rip out the whole wall of cabinets where the old oven and stovetop are to make room for the new range, which meant we’d have to install new cabinets on that wall to replace them anyway. I couldn’t find any stock cabinets available that matched our current size. I felt it would look odd to have mismatched cabinets on one side of the kitchen, so replacing them all sounded like the best option. The old cabinet shelves also weren’t adjustable and didn’t have a tall enough clearance for things like a canister of oatmeal, so that was another bonus of new cabinets. It’s all about the little things.
New cabinets also meant we’d spend more than if we repainted our existing and replaced just the one side of cabinets next to the range.
To see how much new cabinets would cost, we got a quote from a semi-custom cabinet company and were shocked at how much it cost. They always say new cabinets are expensive, and they aren’t kidding. And we don’t even have a ton of cabinets like larger kitchens! I tried to reach out to the cabinet company and see where we could make a few adjustments (I wanted some open shelving) to maybe lower the cost a bit, but they were horrible about getting back to me so after the bad customer service, we nixed that idea. They did provide a handy blueprint we were able to work off of and check prices for stock cabinets at Home Depot. Home Depot cabinets ended up being one fifth of the cost, plus there was no lead time (we only had to order a couple cabinets online, the rest were in stock in our local store).
The great thing about Home Depot stock cabinets is the variety of base and wall cabinet types. They offer a mix of wall and base cabinets, some with larger drawers that are great for storing pots and pans. You can really play with the assortment and pick cabinets based on your needs that fit your kitchen size.
The main concern we had with the Home Depot stock cabinets was quality. If you read the reviews online, they are not great. Most of the them said they were cheaply made and arrived broken in some way. Ugh. I went to our store to check them out myself first hand, and after looking, I thought they actually looked pretty nice and the quality seemed like it’d work fine for us. The quality isn’t top notch and they use a cheaper wood than custom cabinets, but for the price and for the average kitchen, they will work great.
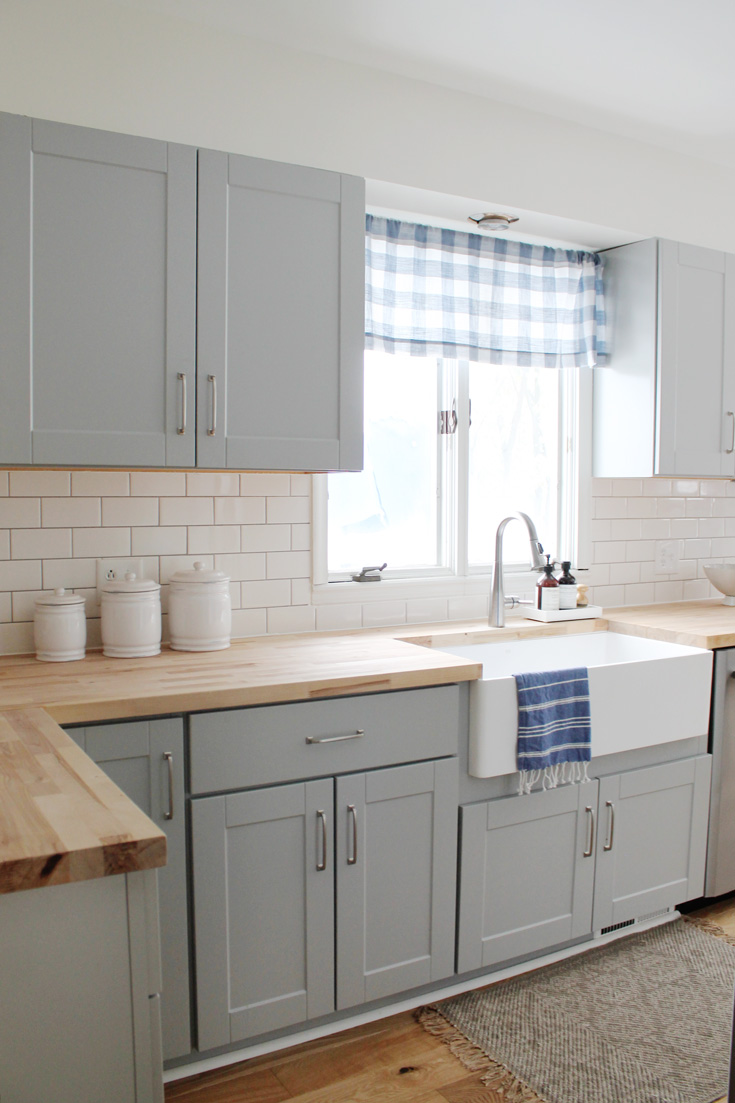
They cabinets were available in either white or a light grey. The gray color came with a shaker door style which I loved, so we went with it!
Ultimately, Jordon and I decided these cabinets were the best solution for us. We picked up all the cabinets in-store, and only had to order 2 that weren’t in stock. These are the pre-assembled shaker cabinets at Home Depot we bought. My biggest suggestion if you are buying the cabinets is to buy them in store if possible. That way you can check over each cabinet to look for damage and get top pick. We ordered 2 cabinets online that weren’t available in-store, and one of the cabinets arrived damaged from shipping. This is where the bad reviews come from. If you can hand pick each cabinet in-store, do it.
At this point, we had a garage full of cabinets, appliances ordered, and all other design selections finalized.
We were ready for demo!
Demo Day
Jordon was eager to rip out cabinets, so I emptied them and packed everything up. He started ripping stuff out one day while I was at work. Nothing like getting texts of your newly gutted kitchen while you’re away! Not stressful at all. #kidding
We did keep the refrigerator as long as we could so we at least had some food for the time being, since the rest of our kitchen was out of use. We resorted to plugging in the microwave in the living room so we could still make oats and sandwiches during the 5 week kitchen renovation without a range.
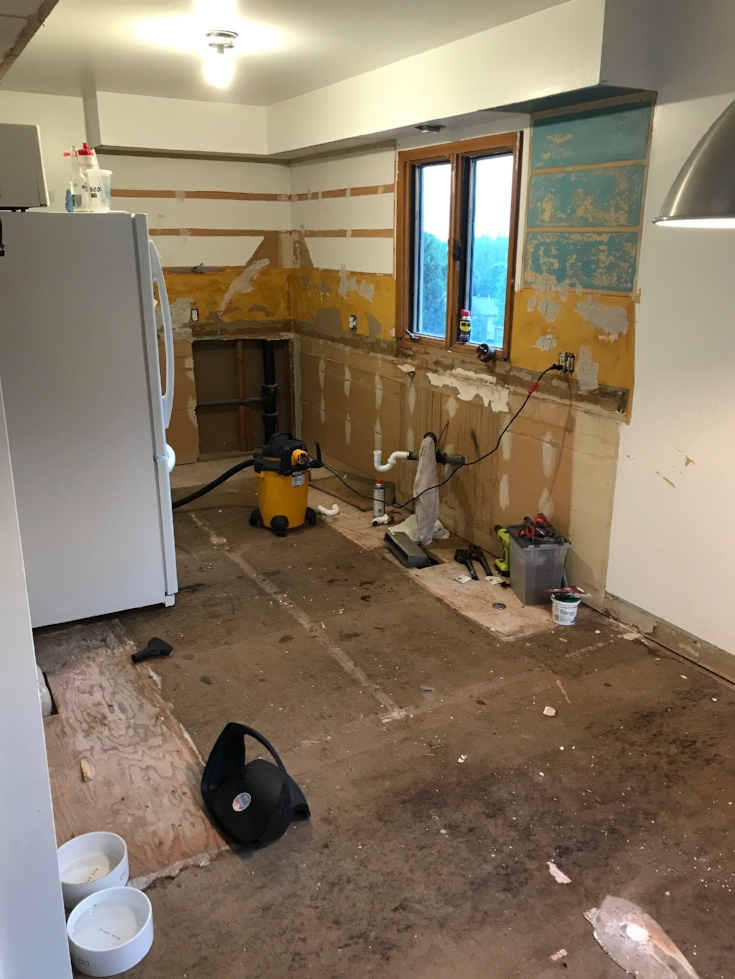

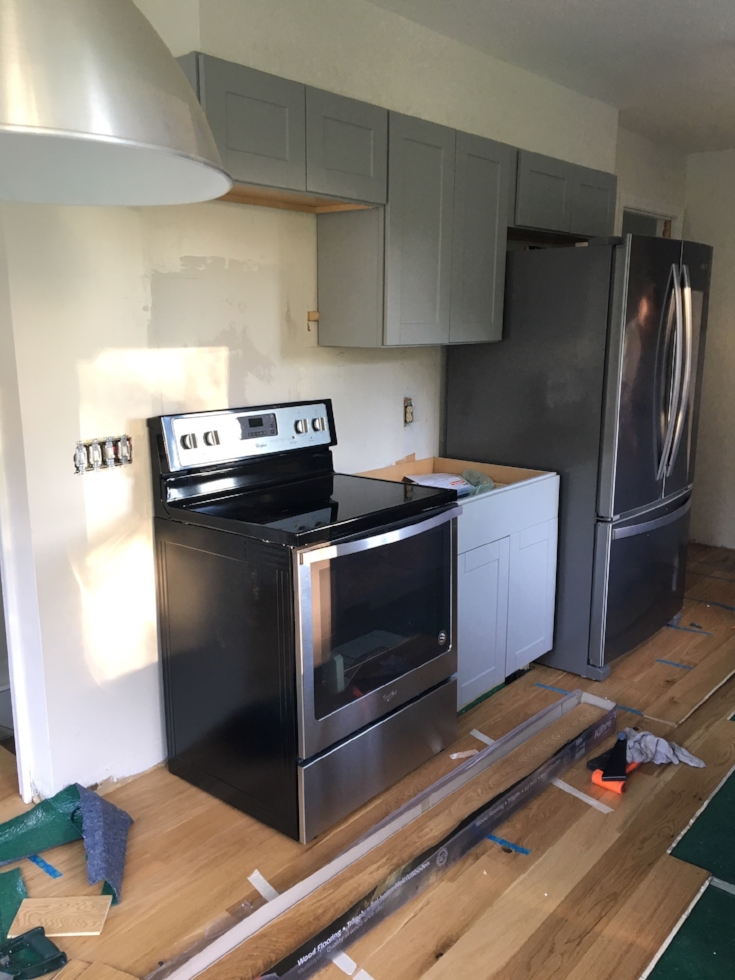
It’s always nerve-racking on demo day because you never know exactly what you’ll uncover. We lucked out and everything was pretty normal, except, after ripping out the stovetop and lower cabinets, we discovered there was a vent that came up from the furnace that out-jetted from the wall. Right where we planned on placing a 12 inch wide cabinet wasn’t going to work anymore, because we needed a wider cabinet to be able to cut the back of it in order to fit over the vent. We were forced to switch the cabinet layout a bit which was a bummer. I planned on adding open shelving above the range, but that had to change. It also meant we no could no longer have cabinets on both side of the range like we originally planned.
Switching around the cabinet layout a couple times caused us to have to return a couple cabinets and order a couple new ones. This ended up setting us back a couple days because we were waiting for the new cabinets to arrive. All of our cabinets were in good shape, but we did have one that arrived a little broken. Luckily, it was only broken in the back and we were able to salvage it, since we didn’t have time to wait a week for a new one to come in.
One other fix we had to do was add a different electrical plug to fit the new range and wire the microwave so it was on a different circuit line.
Installation
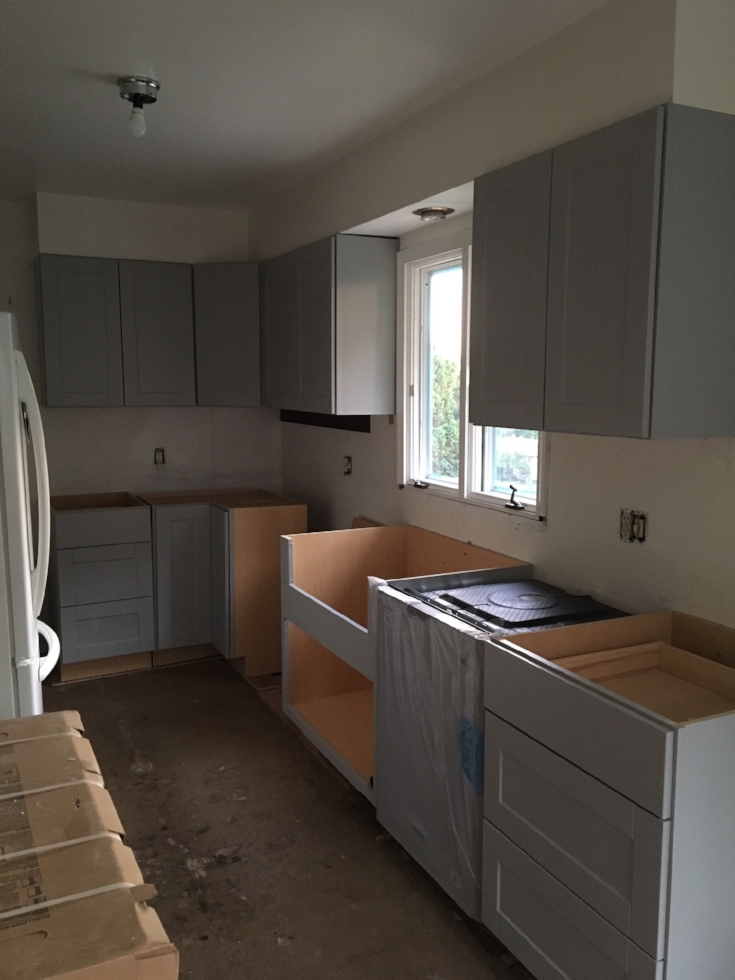

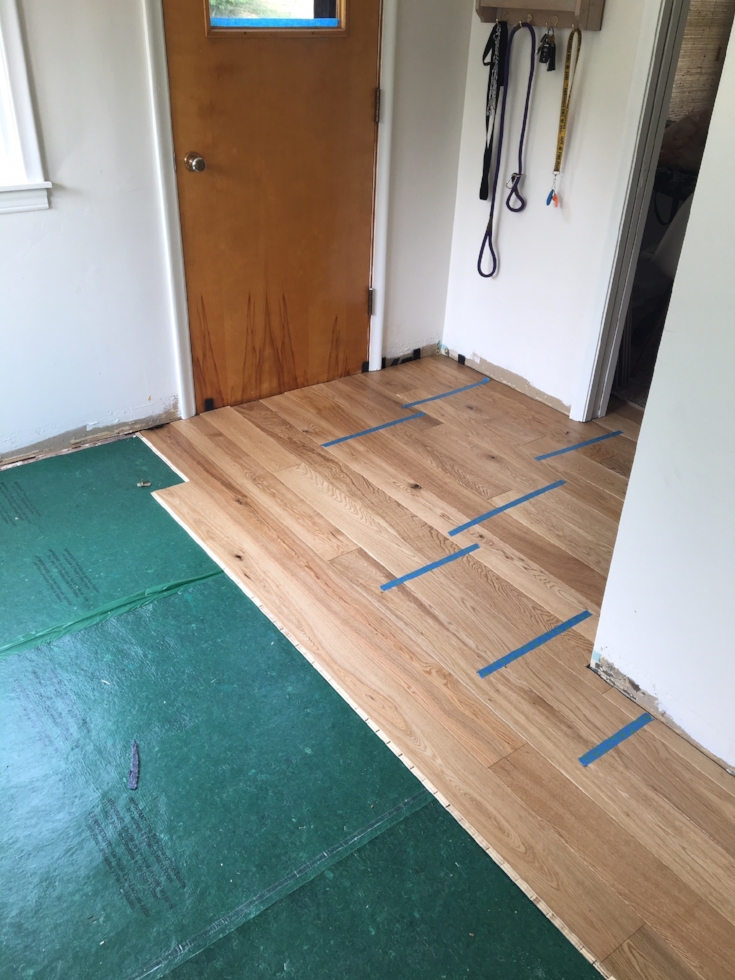


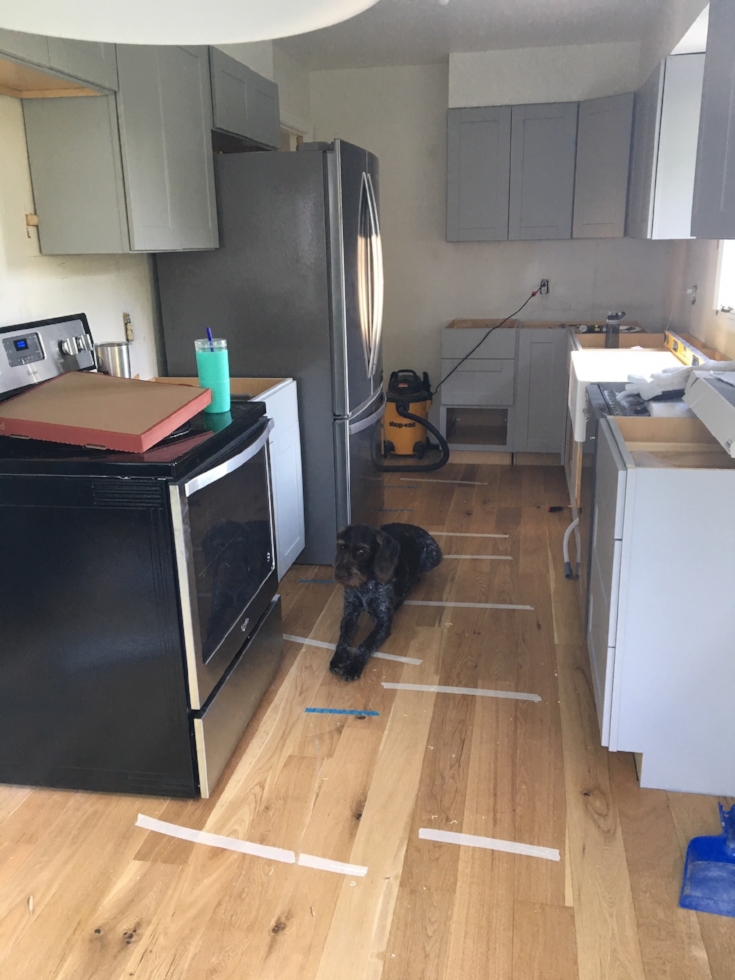

Jordon was somehow able to install all the cabinets himself, leveling them and securing them to the wall. Once the cabinets were in, we could start on the wood flooring. Installing the wood floors took a few days with all the measuring and cutting. When the floors were in, we were ready for the appliances delivery. This was an exciting day! Our kitchen would finally be somewhat useable again and we could stop eating cereal for breakfast, lunch, and dinner. I was ready to have a stove back. Surprisingly, we didn’t eat out once during the work week in the 5 weeks without a stove.
However, we ran into an issue when the appliances arrived. When we picked out appliances, we made sure the size fit within the cabinet space we allotted, but we forgot to account for the doorway leading into the kitchen. Oops! The guys dropped off the appliances but the fridge didn’t fit through the living room/kitchen doorway. We ended up having to remove the doors from the new fridge, and even remove part of the molding on the door frame to just barely be able to squeeze the new fridge in place, with only centimeters to give.
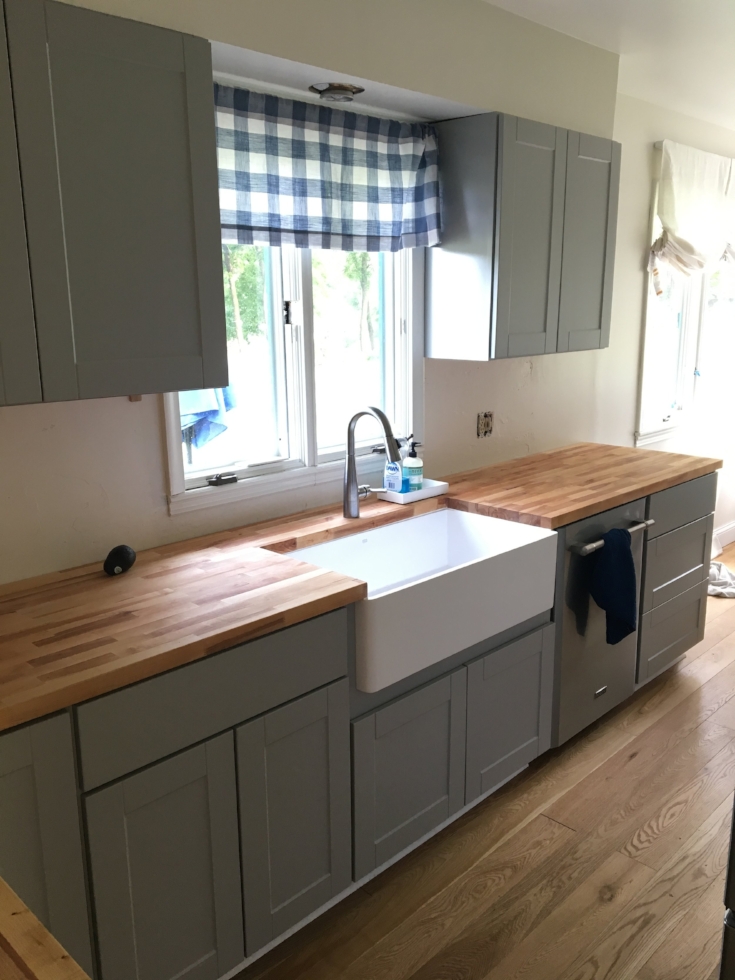
DIY Wood Countertops
With the appliances finally installed, we could start on the DIY wood countertops. We bought slabs of birch butcher block countertops from Menard’s and cut them to fit. They were fairly straightforward to install using this tutorial.
I researched a ton on how to seal the wood and found two options. Use a food grade sealer or use natural with mineral oil. Using a heavy duty wood sealer would protect the wood better longer term, but the sealer also changed the color of the wood and made it much more orangey than I liked. So I decided that applying mineral oil every few months was the best option for us. I made an entire IGTV video on how we care for our butcher block DIY wood countertops you can watch here.
The Home Stretch
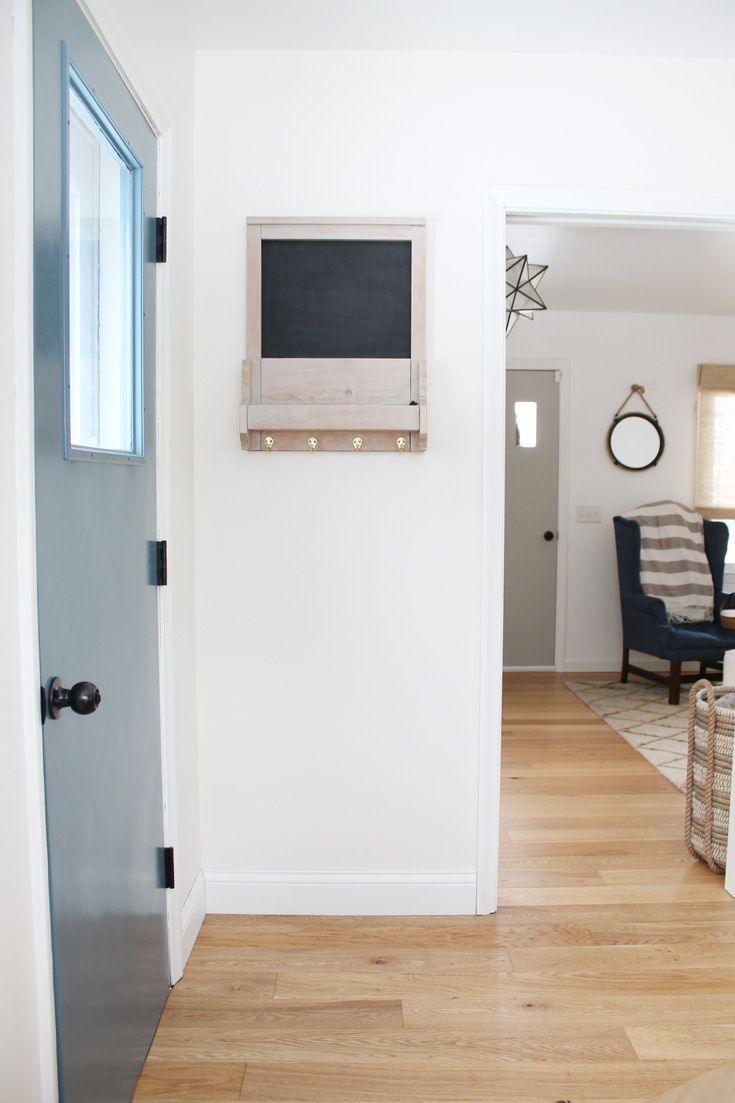
In between the big projects like installing the cabinets, countertops, and appliances, we also finished things like repainting the walls, painting all the kitchen trim, and I painted the side entrance door the same Northern Star blue color we had on our previous kitchen cabinets.
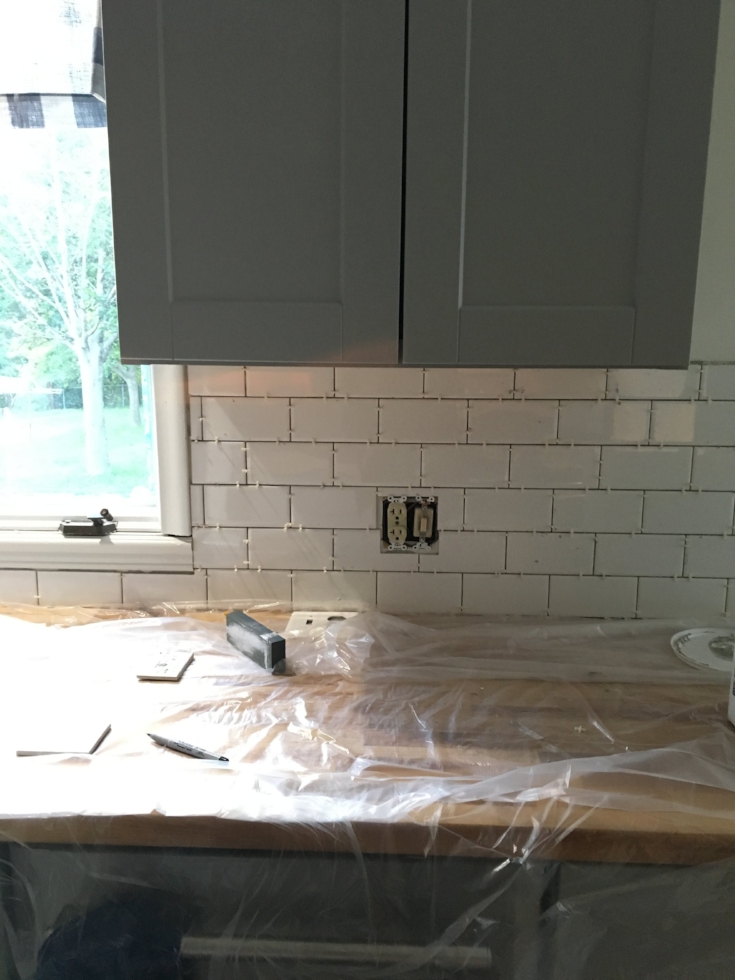
Once the counters were in, we were in the home stretch and could finally see the light at the end of the tunnel! Up next was installing subway tile backsplash and the apron front farmhouse sink.
We went with classic white subway tile with light grey grout because it never goes out of style. Our farmhouse sink was a bit of a splurge and was the most expensive piece in our kitchen outside of appliances. But boy am I glad we got it! The large, single basin is convenient when washing pots and pans and it looks like a showstopper.


The Reveal
After 5ish weeks of work, we finished the kitchen renovation! And with enough time to spare before our wedding 🙂 It was definitely a long few weeks living in a construction zone and spending every available minute on the kitchen. It was a lot of work, but we’re so happy with how it turned out! Every time I walk in our kitchen I’m amazed we tackled all of it ourselves and how good it looks! It truly looks better than I had imagined.


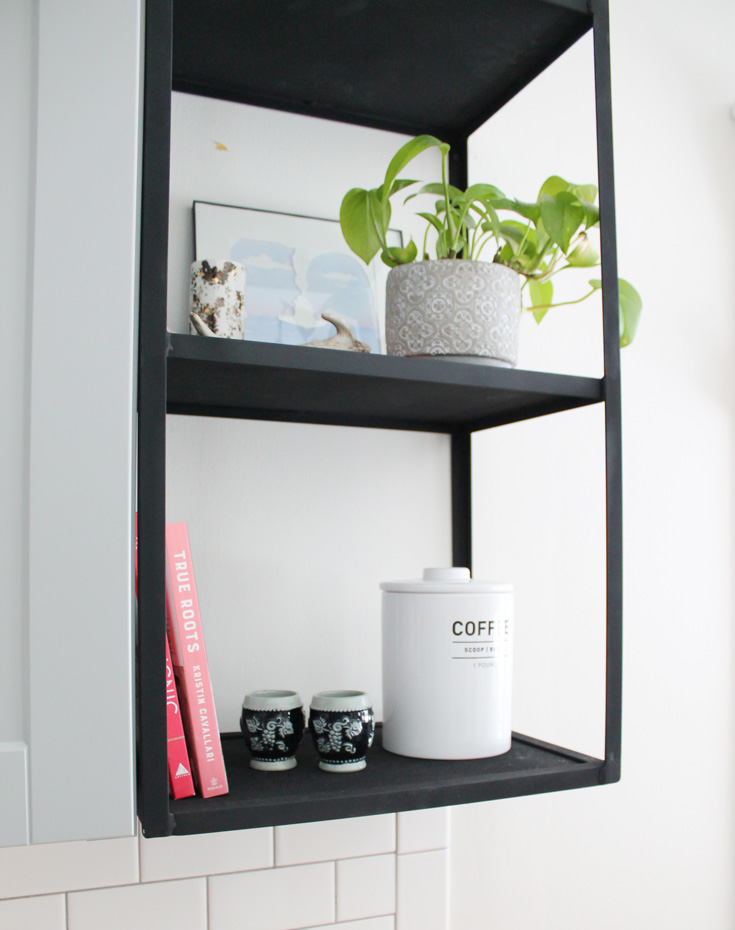
Incorporate Something Unique
To make your kitchen feel truly special and unique, incorporate a piece that’s custom or that has character to make it stand out.
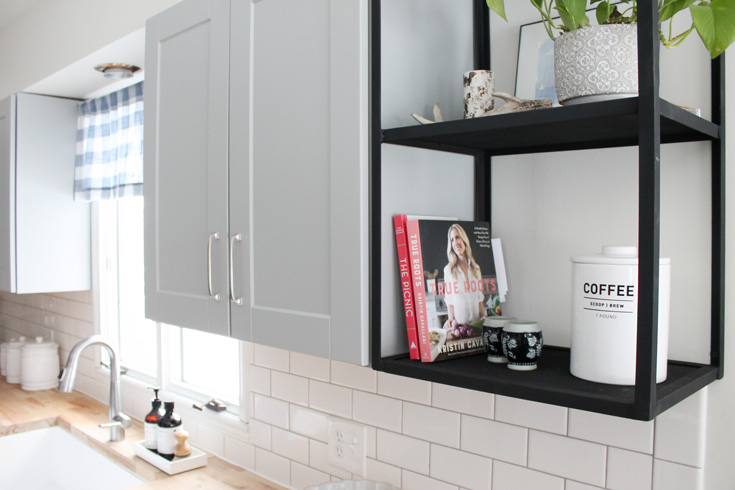
One unique piece we had made for our kitchen is the black metal shelf. Since we were limited to floating kitchen shelving on just the one side of our galley kitchen due to the issue we discovered during demolition, I debated what I wanted to do for open shelving. At first, I was thinking open wood shelves, but I wanted to tie in the matte black accents from the chandelier. Then, I had the idea for a black metal shelf. I sketched it up and a local welder from my hometown brought my vision to life! I love that it’s different and unique yet ties together the space perfectly. Dress it up with pretty vases, a plant and cookbooks to bring in some personality and color!
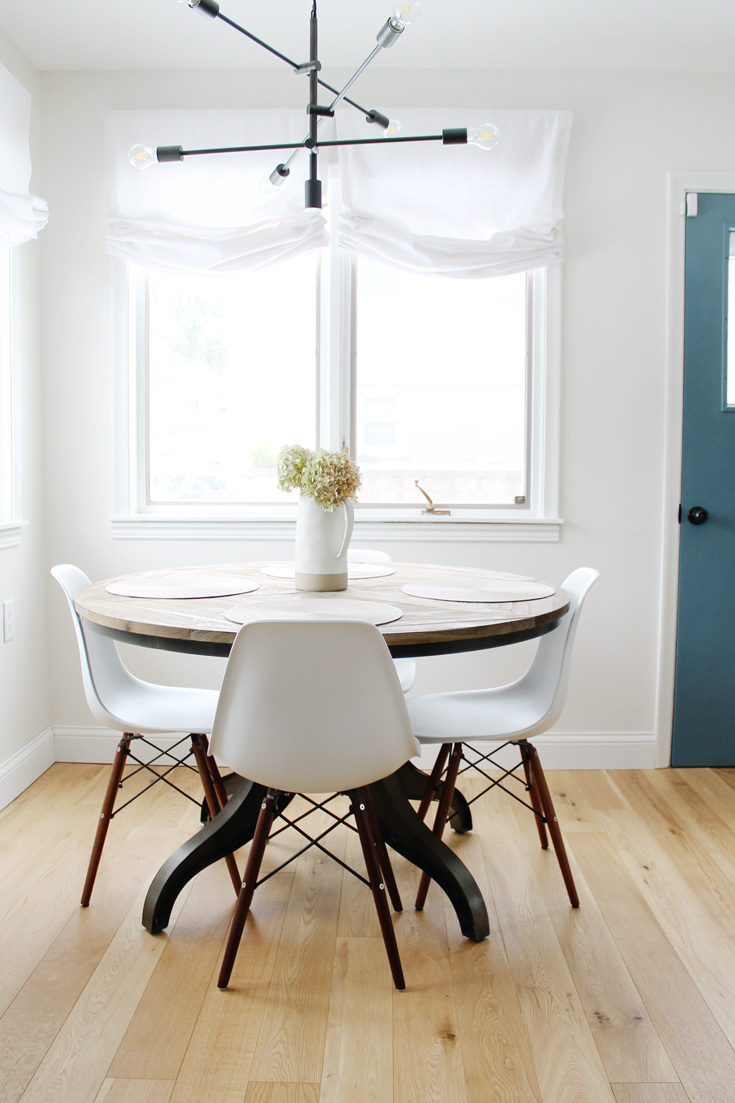
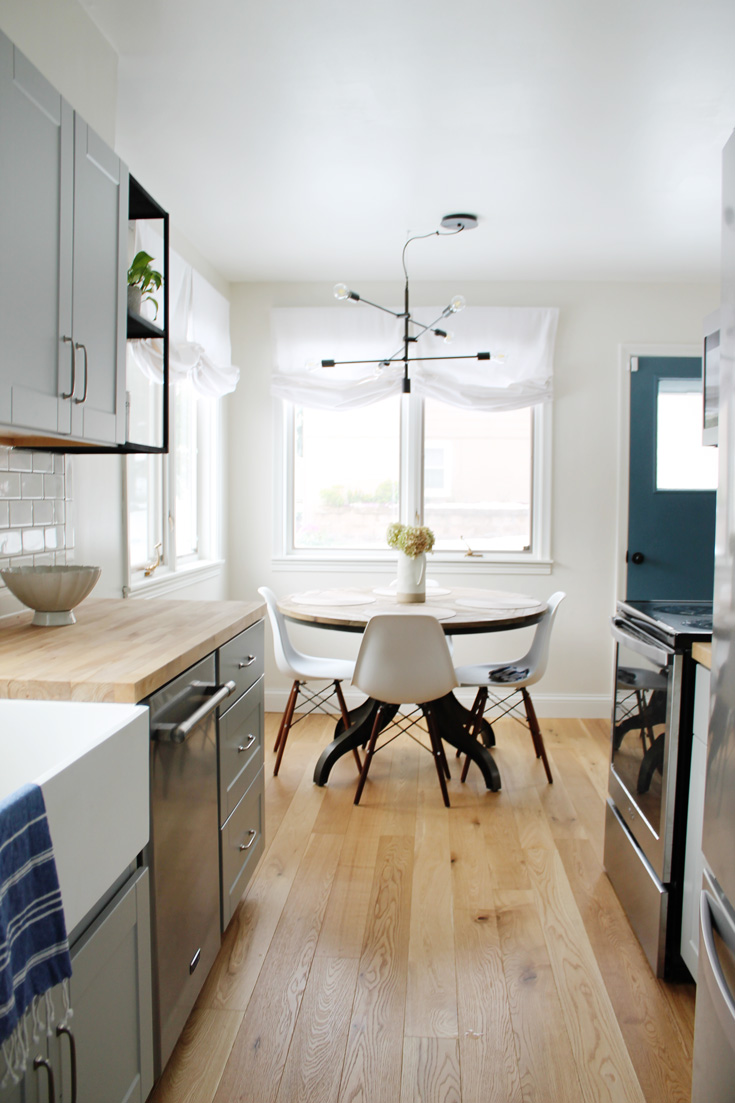
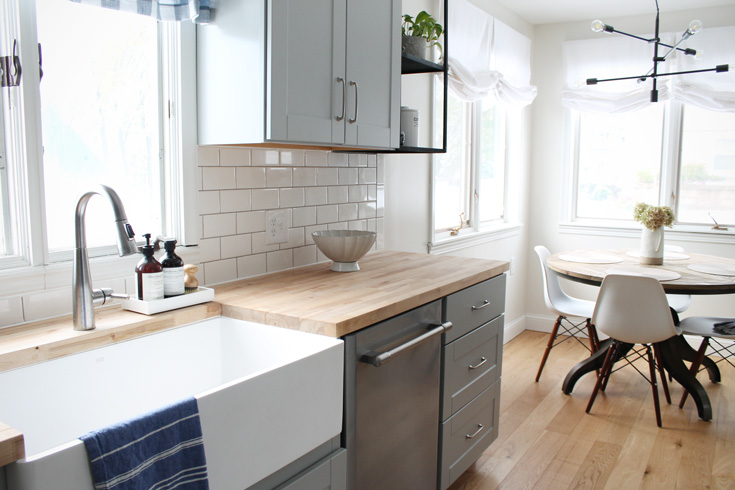
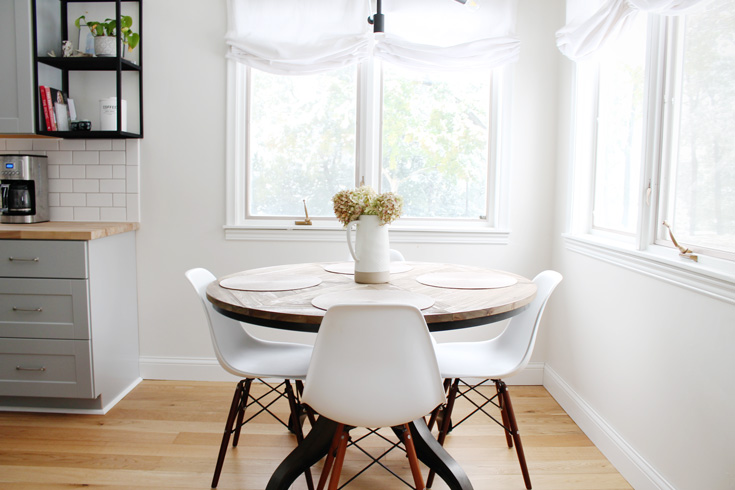
We used our existing kitchen table and modern white chairs and installed a really fun mobile chandelier from West Elm which adds a nice modern touch. I think it compliments the rustic wood table nicely.
For the 4 windows surrounding our kitchen table, we went with white linen outside mount roman shades. I love cordless roman shades because they’re practical and super functional, but the white linen gives them a light, airy feel. Before our kitchen remodel we had blinds with cords, and I will never go back since installing these cordless shades! Cordless is the way to go.


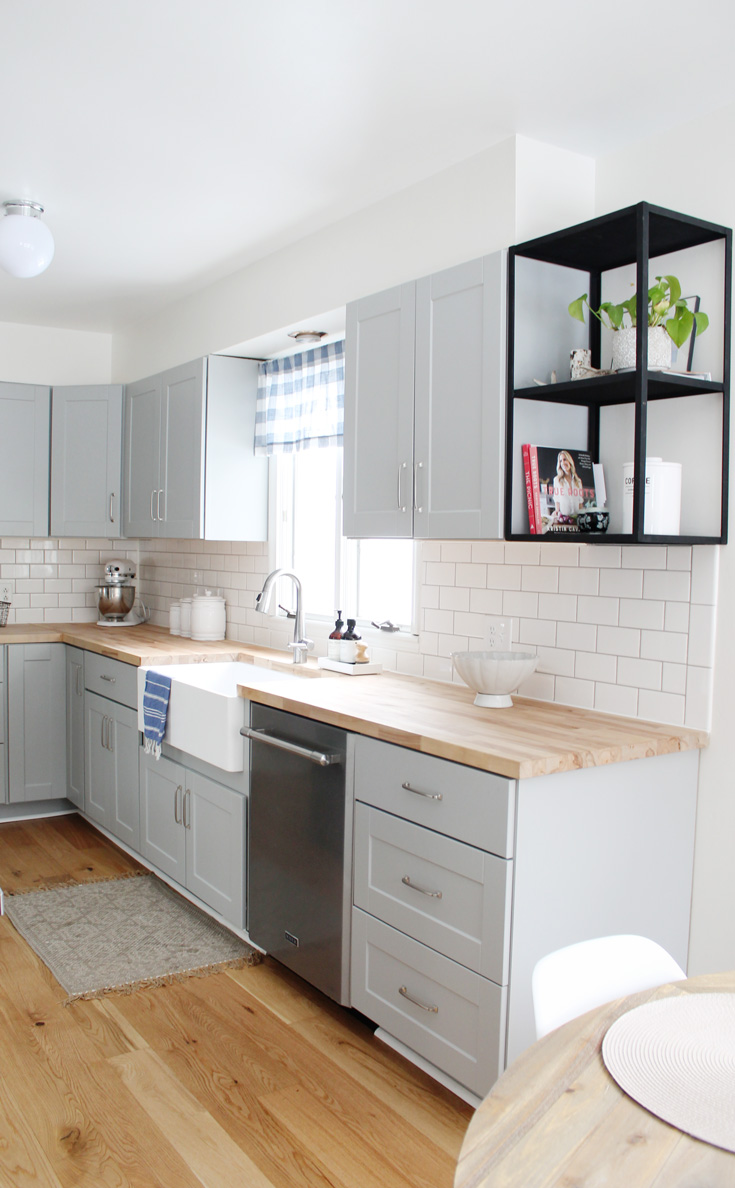


We got our kitchen cabinet hardware off Amazon actually! They have tons of affordable options in large quantities. I decided to go with brushed nickel because I like the softness against our grey cabinets. The blue buffalo check shade above our apron sink makes me smile every time. It adds a fun twist, don’t you think?
If you decide on butcher block wood countertops for your home, I highly suggest using a little tray like the one we have to hold your dish soap (this stuff smells AMAZING!) and dish brush so they aren’t sitting directly on the wood. The bottles will leave water rings otherwise. Even if you don’t have butcher block, I still love having a tray for dish soap and hand soap! Ours has held up for several years.


I hope you enjoyed our little kitchen tour! If I missed anything or if you have questions, ask away in the comments!
Shop Our Kitchen

If you want to take a virtual tour of our kitchen and get a peek at it in real life, watch the video below 🙂
View this post on InstagramOur recent kitchen renovation is on full display as you take a walk through our home


